Featured

Simplicity 8770 Cloak Pattern

So I had this pattern laying around after buying it at Joann’s while it was on sale. I wasn’t quite sure what I wanted to do with it since at the moment I had no desire to make a cloak. Then my mom decided that she both wanted to learn how to sew and how to make a cloak so of course this pattern came in handy for that purpose. I had my mom pick out the materials she wanted to make her cloak out of and while they aren’t really HA they did come out looking really nicely.

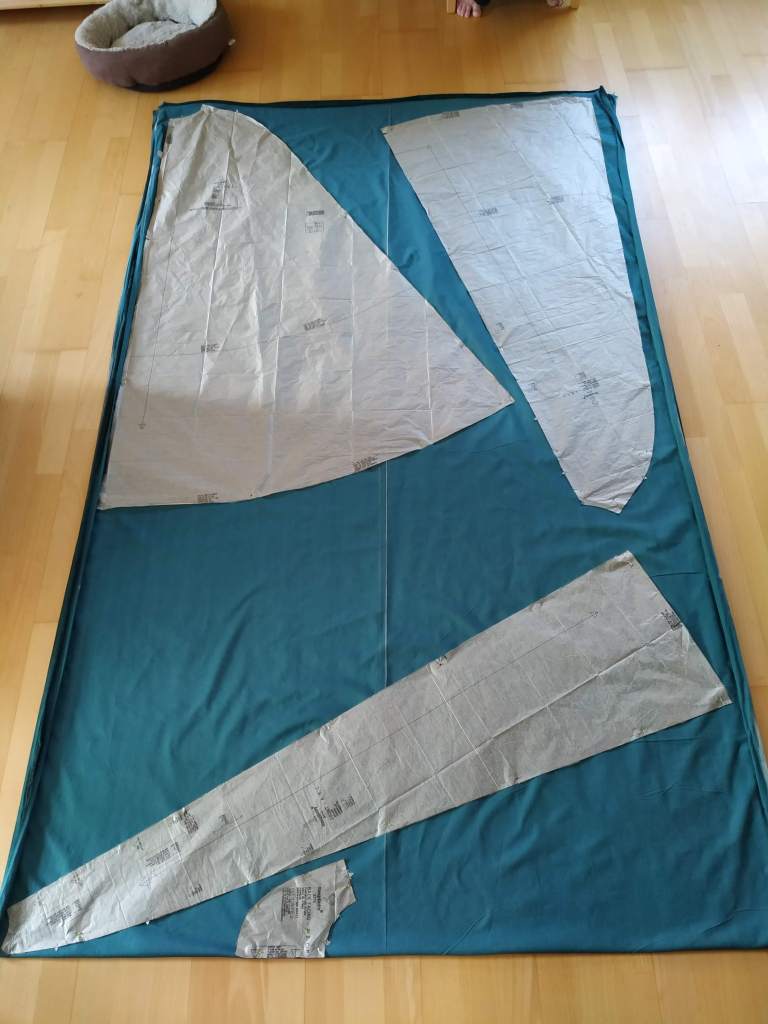
The cloak we ended up making was kind of a mix of both the C and D versions the pattern provided. We actually ended up making two cloaks because the pattern was really very simple to use. The pattern consists basically of a front, side front, and back. The first cloak made of a brown suede material lined with linen only required these two pieces. The second cloak made of a blue/green fabric in a single layer and required a facing to finish off the neck and front edges.

Construction was very easy and there were no complaints about the pattern at all. Though I will say that you should make sure your fabric is wide enough otherwise you’ll have to do some awkward piecing or placement.

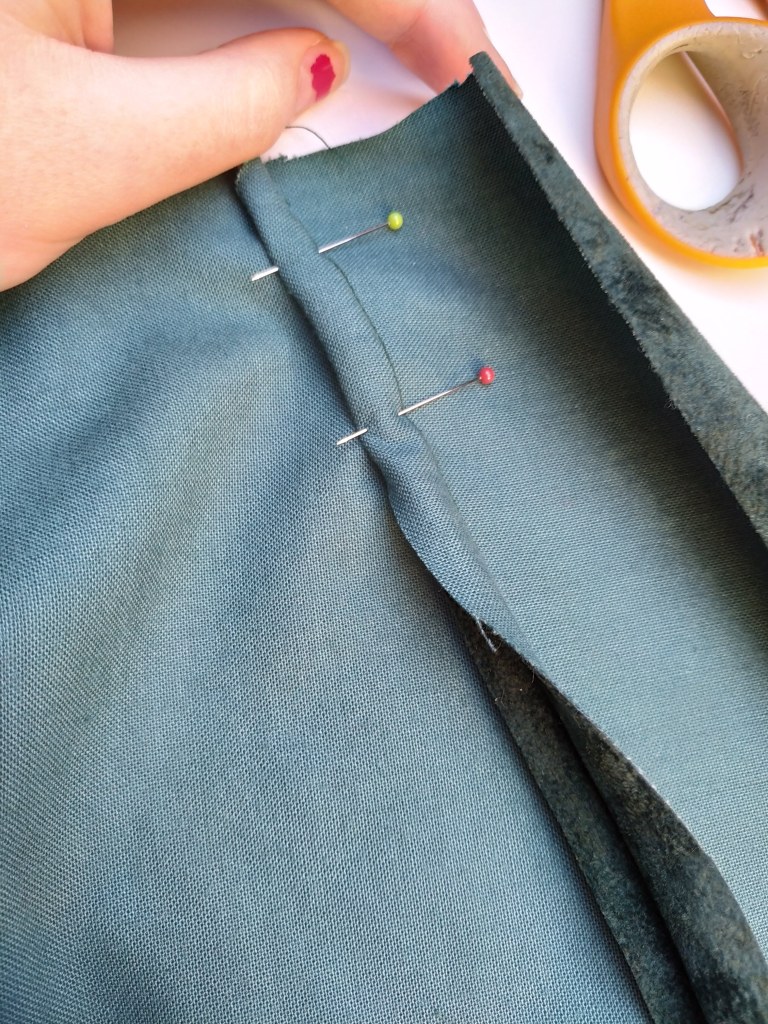
One helpful tip I learned is to always let the garment hang for a day before hemming it to ensure that any of the bias can stretch out. I definitely had some trimming to do after letting the cloak hang out for a bit. Next time though I would probably skip the facing if I was making a single layer cloak and just turn in the edges before sewing them down.

Preparing to flat fell the seams on the blue cloak.

This cloak is a one size fits all pattern. I’d say for anyone 5’7″ and up it will certainly fit with no issue. I’m 5’9″ and the hem falls to about mid calf which is perfect for me because I don’t want it dragging around in the mud or dirt. If you’re really tall the hem would have to be lengthened and if you’re short you’d probably want to shorten it and perhaps take the shoulders in as well.

My favorite thing about this cloak is that it will not choke you. The well fitting shoulders means that it will not shift around and ride up on you while you wear it. You can trust that you’ll be comfortable all day long at whatever event you’re wearing it to.

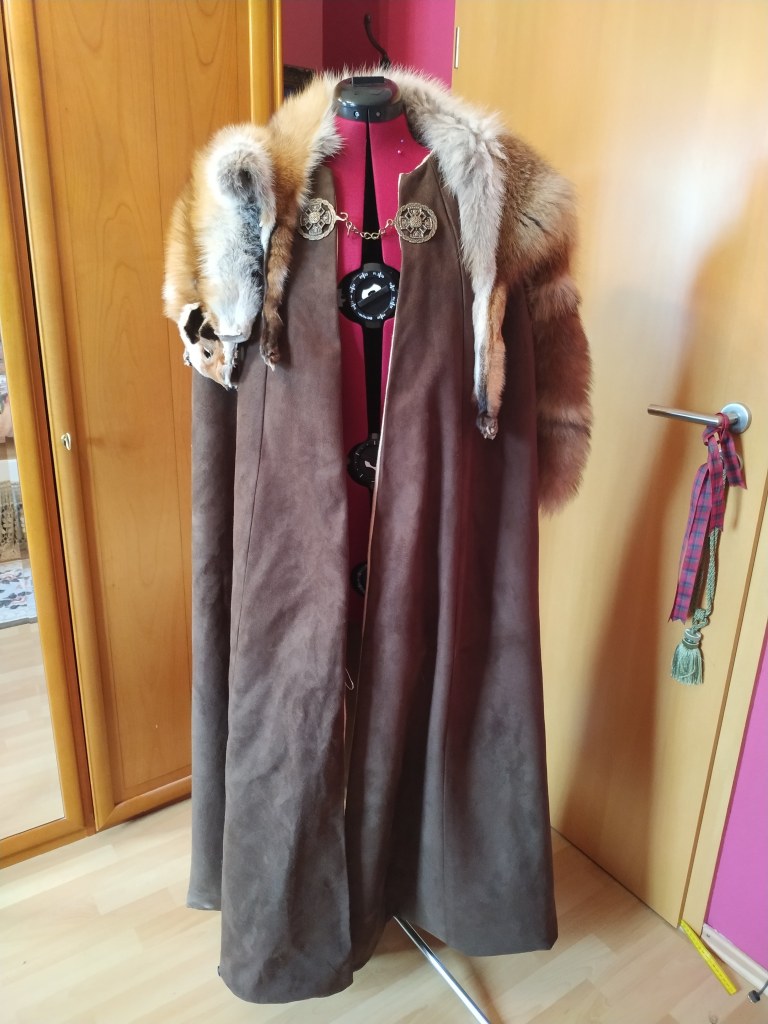
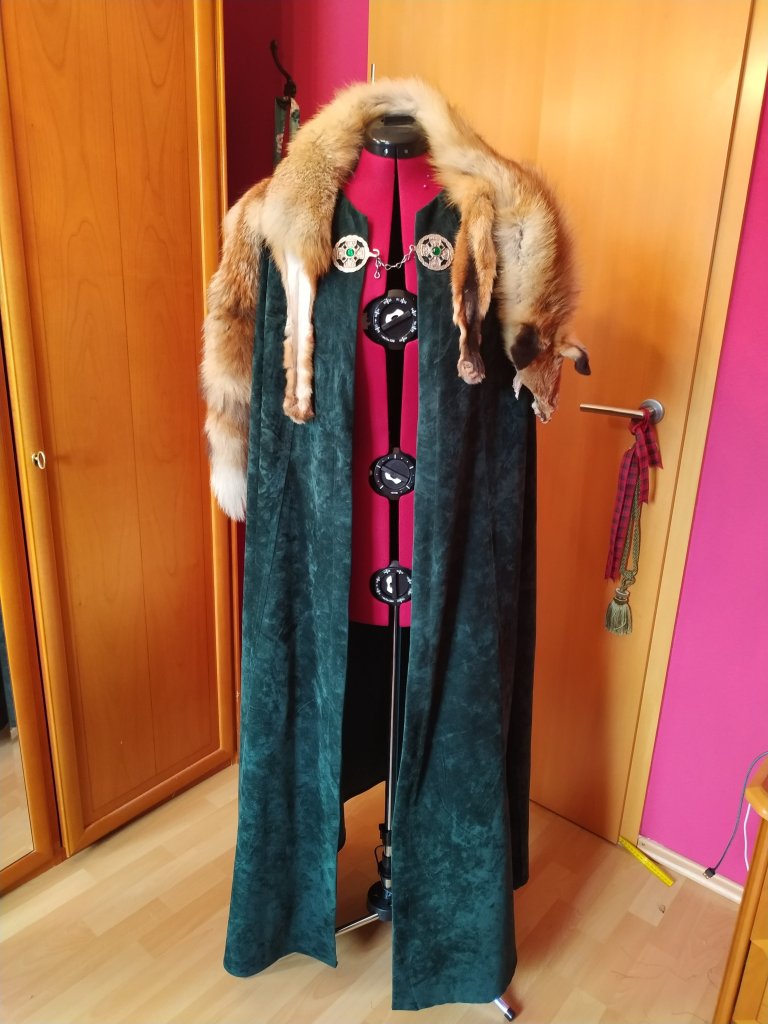
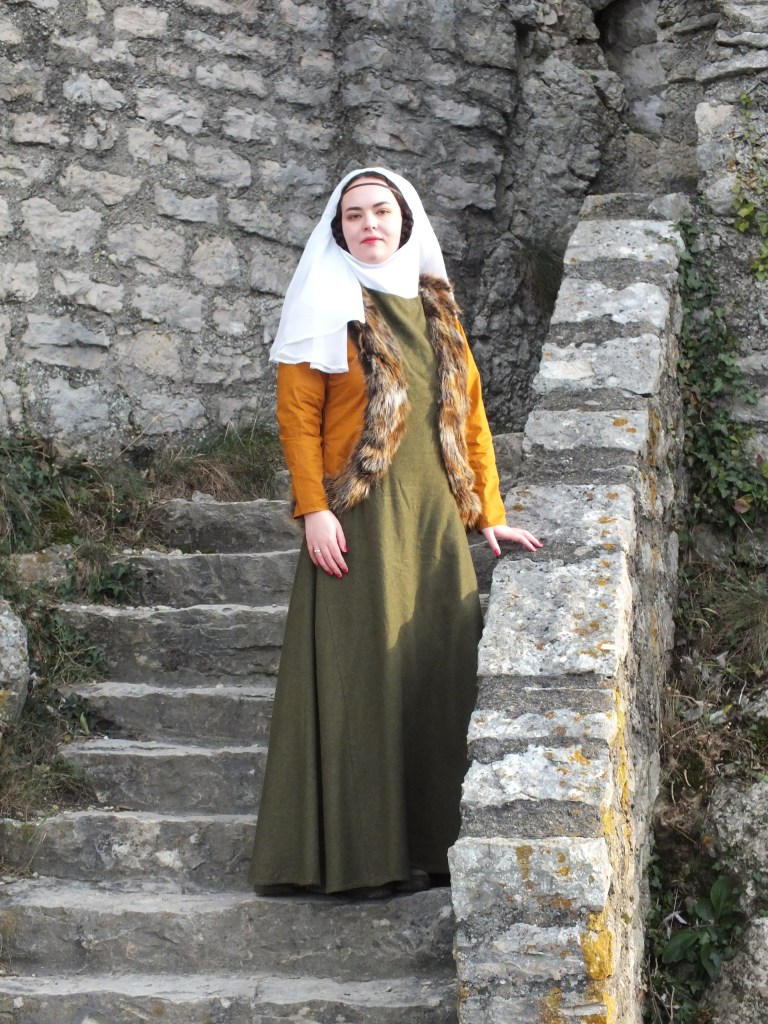
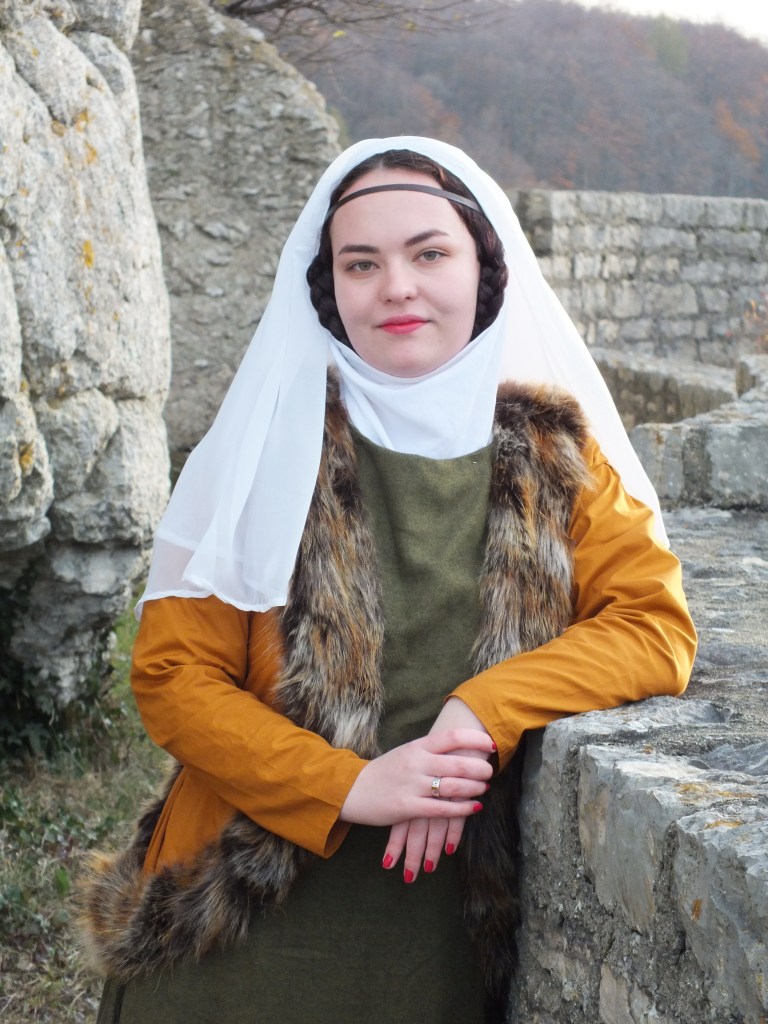
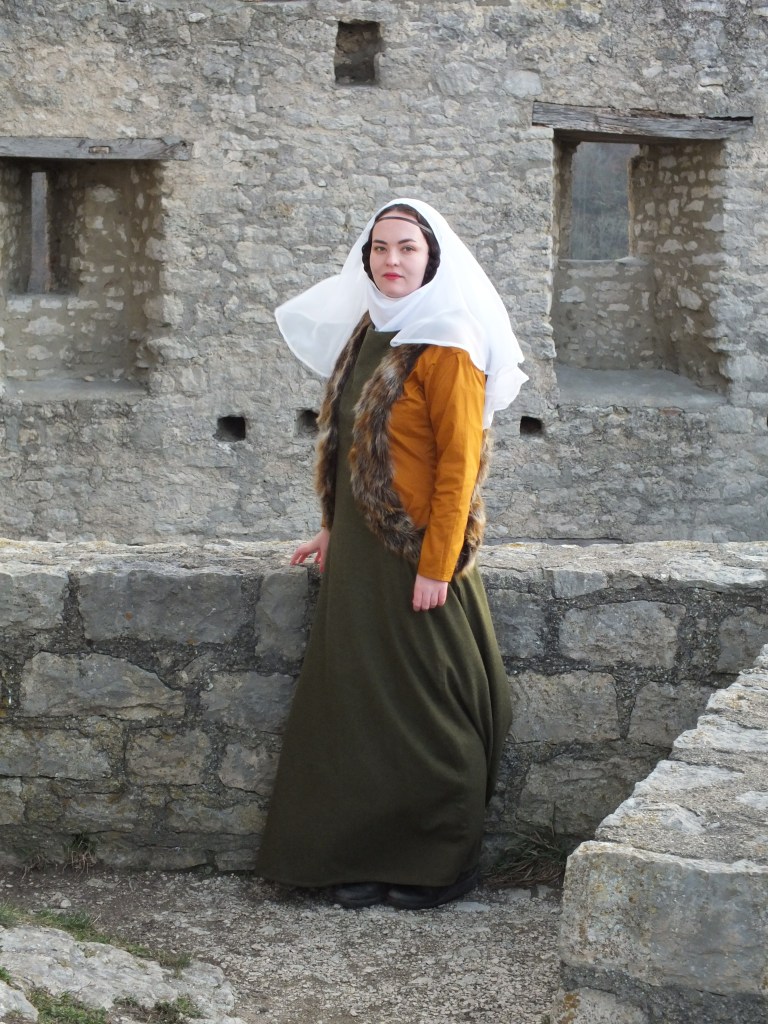
The finished cloaks unfortunately had to get their photos taken inside since there is heavy snow on the ground, therefore here they are in my bedroom on my dress form. Perhaps when they are worn outside in costume I’ll add a few better photos where the coloring is a lot better. The fox pelts were obtained from one of the many medieval markets here in Germany and I think make a nice addition to the cloaks.

Featured

A 14th Century Sideless Surcote

One of the easiest patterns I have ever worked with recently was the Burda 7977 pattern for a medieval style kirtle and sideless surcote. I sometimes have an impulse where I just absolutely have to make something and this was one of those patterns. I ended up wearing it to a medieval faire in Germany and was surprised by how absolutely comfortable and warm I was!

The pattern itself looks like this:

Unfortunately I do not have any photos of the making of this dress as it took place several months before I even started thinking about making a blog. That being said, I can still at least offer my thoughts on the pattern and some photos of the completed outfit.

Picture taken at Reussenstein Castle located in southwest Germany

The kirtle is rather simple with a front and back piece with two side gores cut on the fold. The neckline is clean finished by a facing. The sleeves come in two pieces: the oversleeve and undersleeve. The oversleeve is designed to lace closed over the undersleeve. Both are technically cut out from the same fabric but the undersleeve could be cut from a white linen to imitate the look of a shift if you’re not wearing one. Additionally the lacing could be done away with and replaced with buttons instead which I believe is the more historically accurate method of doing so. I, being lazy, just opted for simplicity so I used only the undersleeve pattern in the making of my kirtle. The back of the kirtle has a facing attached to it as well and is closed with eyelets.

The surcote is made of similar pattern pieces and the neckline is also clean finished with a facing. The pattern suggests to finish the sideless portions by folding the edges towards the outside and covering with trim. I opted for some faux fur instead as that is what I saw in many reference pictures. Adding it was just a matter of measuring the circumference of the “armholes”, choosing the width I wanted, and then adding in the seam allowances.

Gotta love the historically accurate nail polish!

For my head coverings I first started out with a St. Birgitta’s cap. The tutorial can be found here: http://geekyyarn.blogspot.com/2013/11/cap-of-st-birgitta-tutorial.html

Following that I used a rectangular strip of linen I had laying around and hemmed it and used that as my wimple. The wimple gets pinned to the cap. For the veil I used a meter of white organza, cut it into a large circle about 150cm in diameter. For this time period a veil should only come to about shoulder length. I folded it in half because I liked how the fabric draped and then pinned that onto the cap/wimple.

The hair was simply just combing it out, parting it down the middle, and then braiding both sections down over the ears. Once the braids were done I let a portion hang to about chin length and then looped the rest behind my ears and secured the ends to the back of my head with pins. I recommend using some sort of hair product in the way of cream, gel, or pomade to keep the braids looking smooth and prevent any flyaways.

A well pinned veil taking on an icy blast of winter wind

This is a pattern I would absolutely recommend. In fact I will be helping my mom learn to sew with it. The instructions are easy to follow and the dress can be made very quickly. Numerous modifications can be made to it to suit your needs. Most importantly it’s just incredibly comfortable. That’s my favorite thing about it.

If you’ve made this dress too let me know how it came out!

Design a site like this with WordPress.com
Get started